I hope this help and to anyone who would try it, please please please do it at your own risk. I can not be held liable for any problem including but not limited to loss of data. So far I have had no problem but YMMV.
- Introduction -
Currently Insync do not offer a portable version of their client, however it is not too difficult to create one. By "portable" here I only mean a version which you do not need to install and can be used from without administrator privileges. I have no idea whether the program modifies the registry when running.
- Requirements -
- We must download the Windows version of the InSync client (because this tutorial only works for the Windows version).
- We also require the amazing "Universal Extractor" (available here). Be sure to download the "portable" version (it wouldn't make sense having to install a program to make another program portable, would it?
- Open (unpack/unrar) and Run the universal extractor program. You should see a screen such as this:

- In the "Archive/Installer to extract" select the Insync installer that you previously downloaded (should be named "Insync-0.9.XX.YYYY.exe"
- After selecting the installer, the "Destination directory" text field will be automatically filled. If you want to change it do it now, otherwise note the location of this folder.
- Press "OK"
- Wait for some time until the program has finished extracting the files to the specified folder.
- Open to the output folder. You should see the following files and folders:


- Now, go to the $INSTDIR folder and within this, to the res folder. You should see several icons (image files with .ico extension).
- look for the file named "taskbar-normal.ico". Make a copy of it (select it, press CTRL+C and then CTRL+V) . You should have a new file called "taskbar-normal copy.ico" or similar.
- Rename the copy you just made exactly to "taskbar-normal-update.ico" (take care of not adding spaces or an additional ".ico" if your Windows is configured to hide extensions).
- Repeat step 2 and 3 for the file: "taskbar-syncing-4.ico" (copying this file) renaming it to "taskbar-syncing-4-update.ico"
- Repeat steps 2 and 3 for the files:
taskbar-syncing-3.ico
taskbar-syncing-2.ico
taskbar-syncing-1.ico - At the end you should have created the following new files:
taskbar-normal-update.ico
taskbar-syncing-4-update.ico
taskbar-syncing-3-update.ico
taskbar-syncing-2-update.ico
taskbar-syncing-1-update.ico - Now go to the folder $PLUGINSDIR (under the main folder where you extracted the contents of the installer). You should see the following files:
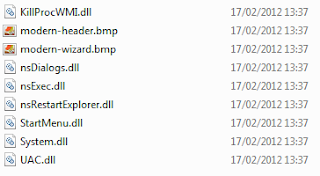
- Move all those file to the $INSTDIR folder (where the insync.exe program is located)
- Finally, rename the $INSTDIR folder to something like InSyncPortable or any other meaningful name you want.
- Move this folder to your prefered location. Use the insync.exe file to launch the program.

And that's it. I have been using the InSync client in this way for about 2 weeks without a problem. And to my surprise the client was even automatically updated!
No comments:
Post a Comment